Keycloak as SSO in Nextcloud
1. Keycloak configuration
1.1 Create a client
We need first to create a client in keycloak, to connect to Nextcloud.
Name Client id as you wish.
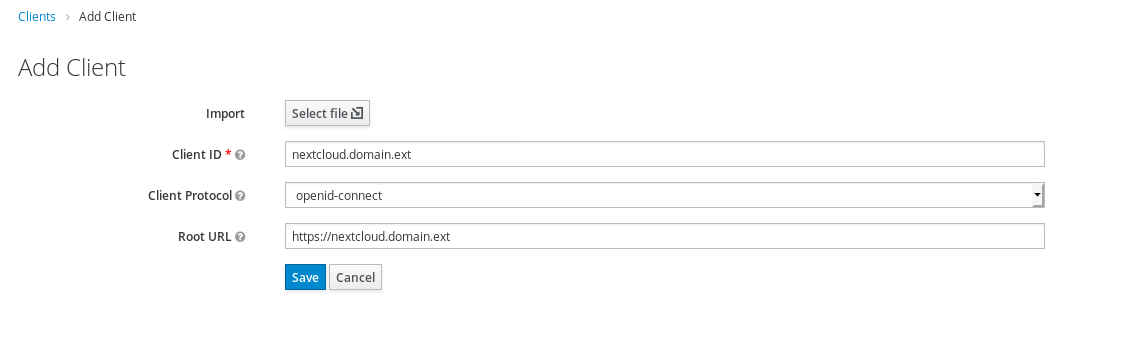
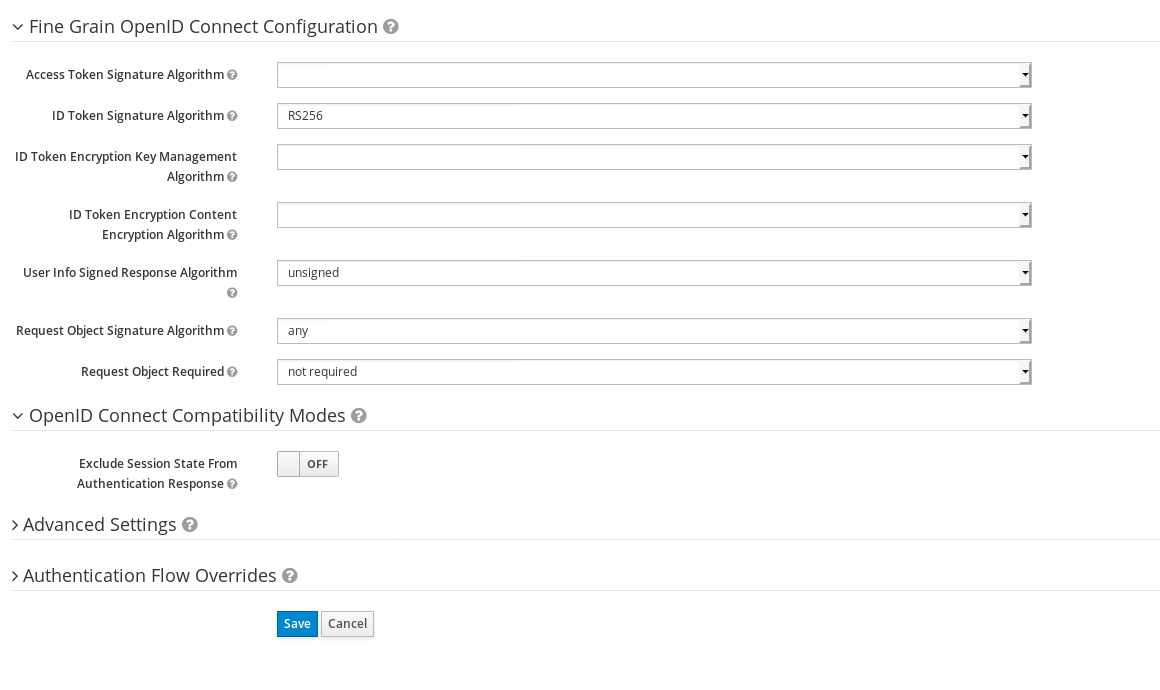
Use the following settings:
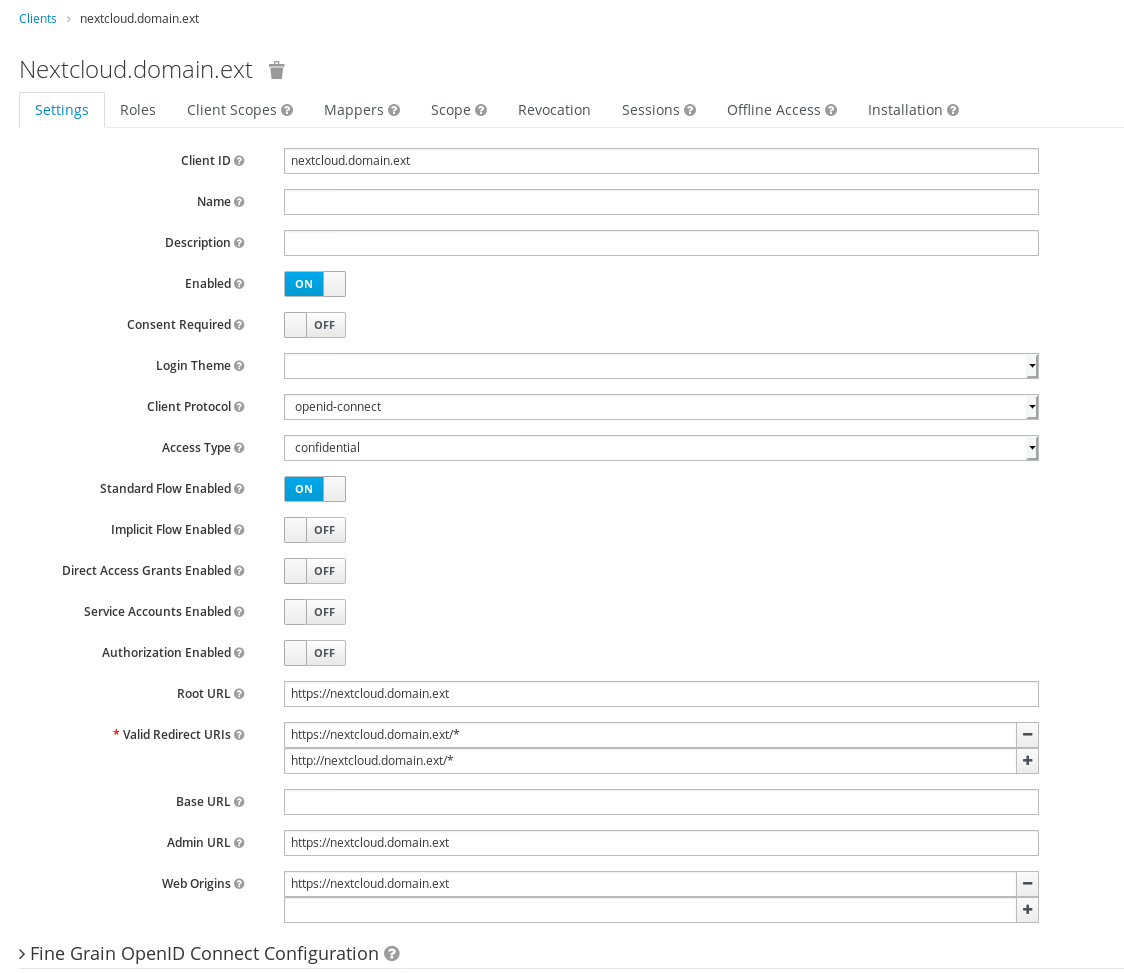
and
1.2 Map groups in client
Since user management is reserved to Keycloak, we need to configure a mapper will reflect user/group configuration in Nextcloud.
In fact, we won't
1.2.1 Create a new role in client
In Roles tab, we create a role admin that we will map to Nextcloud.

Create here all the groups you'll need in Nextcloud
**You will also have to create them in Nextcloud! **
1.2.2 Configure mapper for roles
This will allow us to map roles from client to nextcloud's groups.

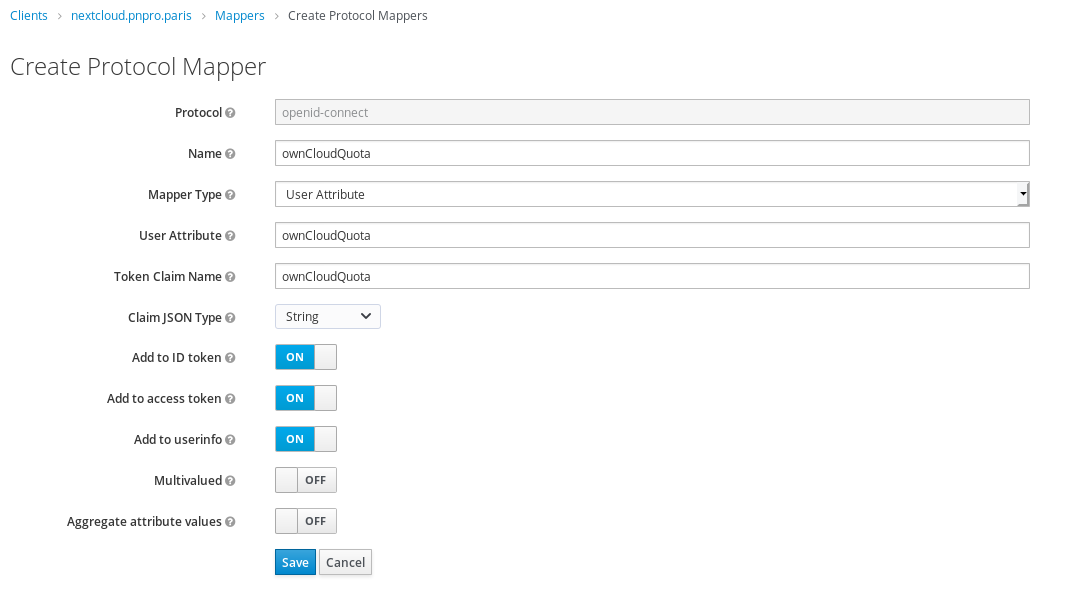
Choose the Name you want, but Token Claim Name must be ownCloudGroups.
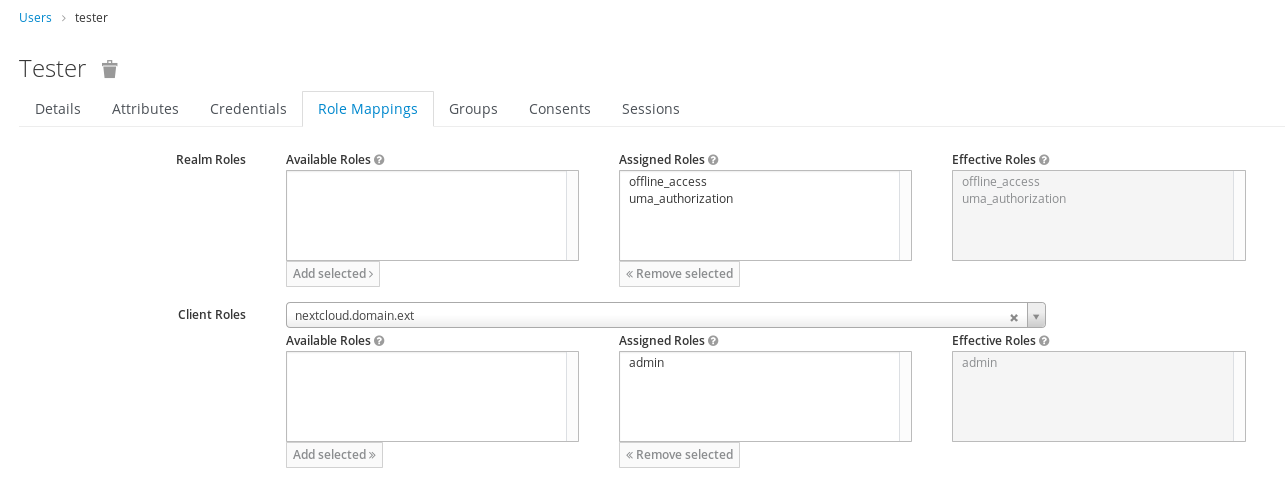
1.2.3 Map roles for user
Go to an admin user you created (or create an user) and map admin role we created.
Go to the Role Mappings tab, then select the client you created in the Client Roles selection box, then click on Add Selected in the bottom-left to promote a role from available to assigned roles.
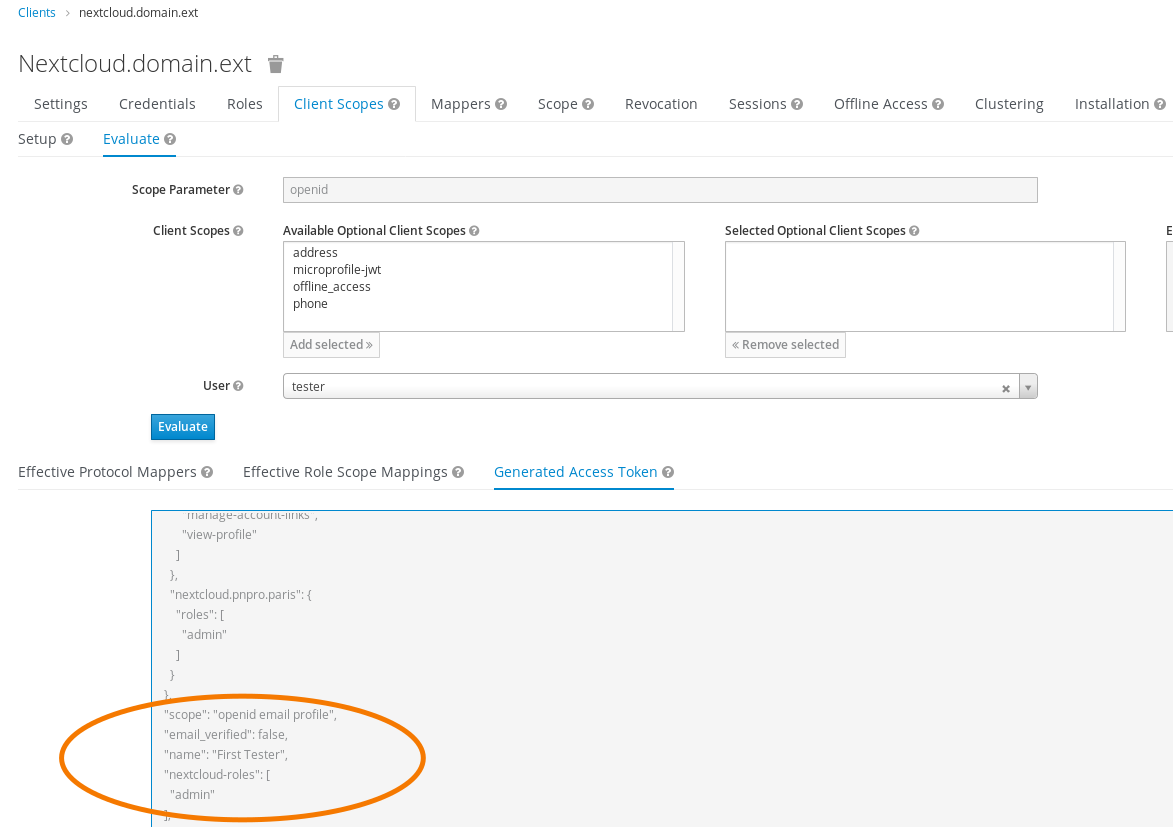
1.2.4 Check if mapping has been catched by client
Go back to client part and evaluate client scope for the admin user you just configured.
Go to your client, tab Client Scopes, select your user and clic on Evaluate.
Check the Generated Access Token tab to see if the user get admin role.
1.3 Map quota
We have the ability to define storage quota for each user we create.
1.3.1 Configure mapper for quota
1.3.2 Configure quota for user

1.4 Get informations
We need client secret and realm endpoints to configure nextcloud.
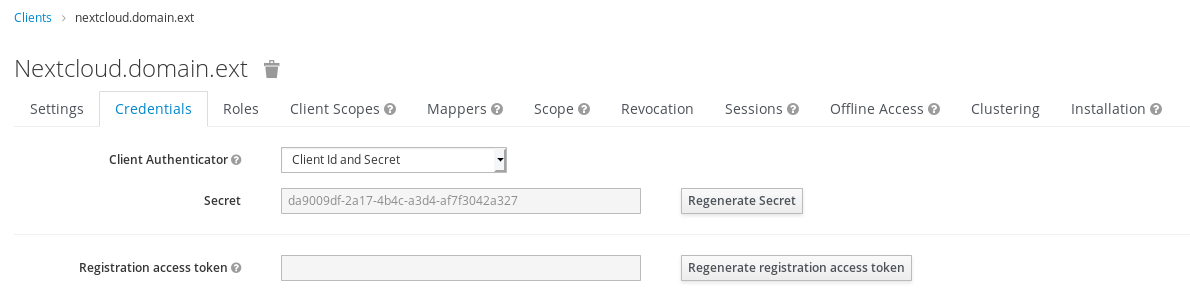
1.4.1 Get Client Secret
Go in Client -> Credentials, to get client secret that we will need to configure nextcloud plugin.
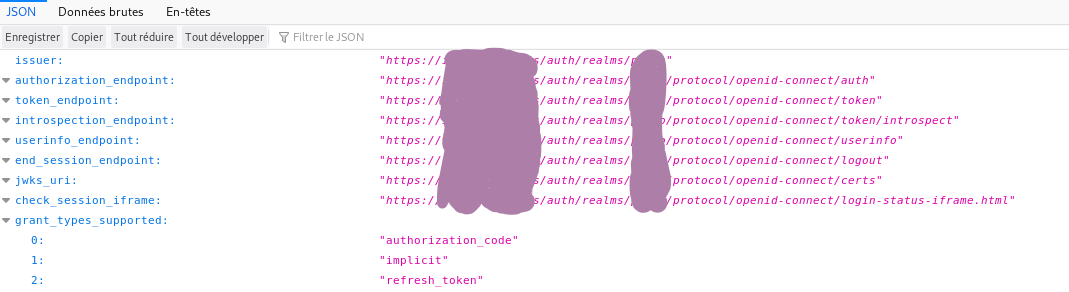
1.4.2 See Endpoints
You will also need endpoints urls to adapt Nextcloud Social Login plugin configuration.
Go in Realm Settings -> General, clic on OpenID EndpointConfiguration.
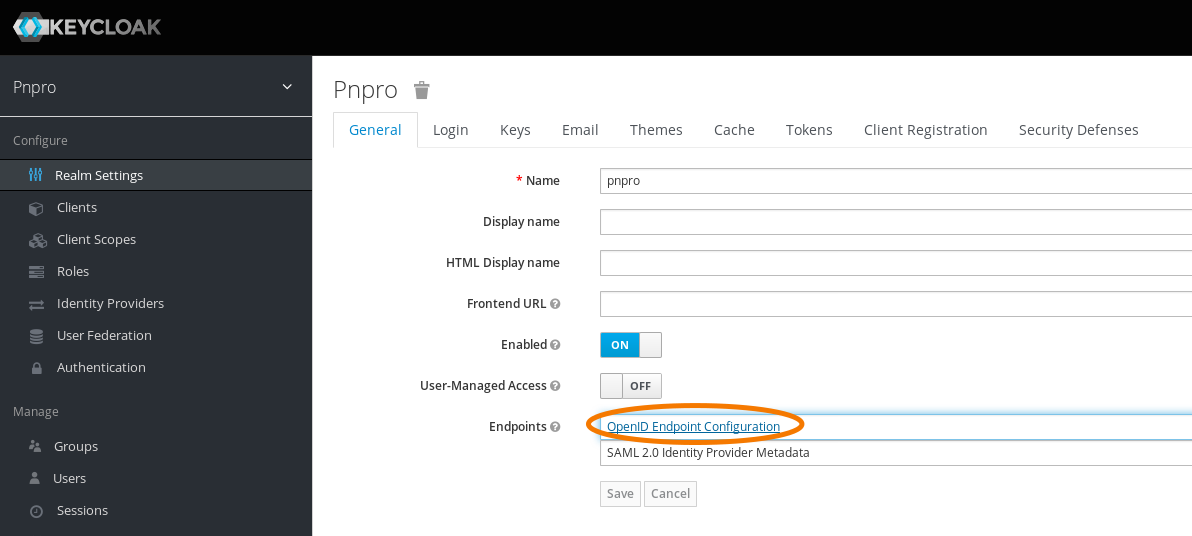
You will be redirected to the API endpoint, showing you endpoits url and other infos:
1.4.3 Install the plugin
OpenID Connect Login is a plugin made by pulsejet that can be found in Nextcloud AppStore.
1.4.4 Configure Nextcloud
Configuration of the plugin can only be made by modifying config.php.
Unroll to see config.php useful settings:
$CONFIG = array (
    'allow_user_to_change_display_name' => false,
    'lost_password_link' => 'disabled',

    // URL of provider. All other URLs are auto-discovered from .well-known
    'oidc_login_provider_url' => 'https://keycloak.domain.ext/auth/realms/YOUR-REALM',

    // Client ID and secret registered with the provider
    'oidc_login_client_id' => 'nextcloud.domain.ext', // Client ID, Step 1
    'oidc_login_client_secret' => 'secret', // Client Secret: Got to Clients -> Client -> Credentials

    // Automatically redirect the login page to the provider
    'oidc_login_auto_redirect' => false,

    // Redirect to this page after logging out the user
    'oidc_login_logout_url' => 'https://keycloak.domain.ext/auth/realms/YOUR-REALM/protocol/openid-connect/logout?&redirect_uri=http%3A%2F%2Fnextcloud.domain.ext%2F',

    // Quota to assign if no quota is specified in the OIDC response (bytes)
    'oidc_login_default_quota' => '1000000000',

    // Login button text
    'oidc_login_button_text' => 'OpenID',

    // Attribute map for OIDC response. Available keys are:
    //   i)   id:       Unique identifier for username
    //   ii)  name:     Full name
    //   iii) mail:     Email address
    //   iv)  quota:    Nextcloud storage quota
    //   v)   home:     Home directory location. A symlink or external storage to this location is used
    //   vi)  ldap_uid: LDAP uid to search for when running in proxy mode
    //   vii) groups:   Array or space separated string of NC groups for the user
    //
    // The attributes in the OIDC response are flattened by adding the nested
    // array key as the prefix and an underscore. Thus,
    //
    //     $profile = [
    //         'id' => 1234,
    //         'attributes' => [
    //             'uid' => 'myuid'
    //         ]
    //     ];
    //
    // would become,
    //
    //     $profile = [
    //         'id' => 1234,
    //         'attributes_uid' => 'myuid'
    //     ]
    //
    'oidc_login_attributes' => array (
        'id' => 'preffered_username',
        'name' => 'name',
        'mail' => 'email',
        'quota' => 'ownCloudQuota',
        'home' => 'homeDirectory',
        'ldap_uid' => 'uid',
        'groups' => 'ownCloudGroups',
    ),

    // Default group to add users to (optional, defaults to nothing)
    'oidc_login_default_group' => 'oidc',

    // Use external storage instead of a symlink to the home directory
    // Requires the files_external app to be enabled
    'oidc_login_use_external_storage' => false,

    // Set OpenID Connect scope
    'oidc_login_scope' => 'openid profile',

    // Run in LDAP proxy mode
    // In this mode, instead of creating users of its own, OIDC login
    // will get the existing user from an LDAP database and only
    // perform authentication with OIDC. All user data will be derived
    // from the LDAP database instead of the OIDC user response
    //
    // The `id` attribute in `oidc_login_attributes` must return the
    // "Internal Username" (see expert settings in LDAP integration)
    'oidc_login_proxy_ldap' => false,

    // Disable creation of new users from OIDC login
    'oidc_login_disable_registration' => false,

    // Fallback to direct login if login from OIDC fails
    // Note that no error message will be displayed if enabled
    'oidc_login_redir_fallback' => true,

    // Use an alternative login page
    // This page will be php-included instead of a redirect if specified
    // In the example below, the PHP file `login.php` in `assets`
    // in nextcloud base directory will be included
    // Note: the PHP variable $OIDC_LOGIN_URL is available for redirect URI
    // Note: you may want to try setting `oidc_login_logout_url` to your
    // base URL if you face issues regarding re-login after logout
    //  'oidc_login_alt_login_page' => 'assets/login.php',

    // For development, you may disable TLS verification. Default value is `true`
    // which should be kept in production
    'oidc_login_tls_verify' => true,

    // If you are behind a proxy
    'overwriteprotocol' => 'https',
);